
Install Mizar with a Samsung display
This guide takes you from the box to art on the wall, with pictures. It assumes the Samsung display kit: the display, your Mizar, its power supply, a mount, an HDMI cable and the small black control cable. Allow about 30 minutes.
It may arrive in two deliveries. The Samsung display and its mount ship separately from the Mizar box, so don't worry if one package arrives first. The order isn't incomplete.
Before you start
- Your Wi-Fi name and password. If your router shows two networks (2.4 GHz and 5 GHz), pick the 2.4 GHz one.
- Your phone with Bluetooth turned on. On Android, allow location when the app asks.
- Your Nimbus sign-in: the email and password you used to order.
- A flashlight helps with step 2.
If you're using your own TV instead, follow the Mizar steps in Getting started.
What's in the box
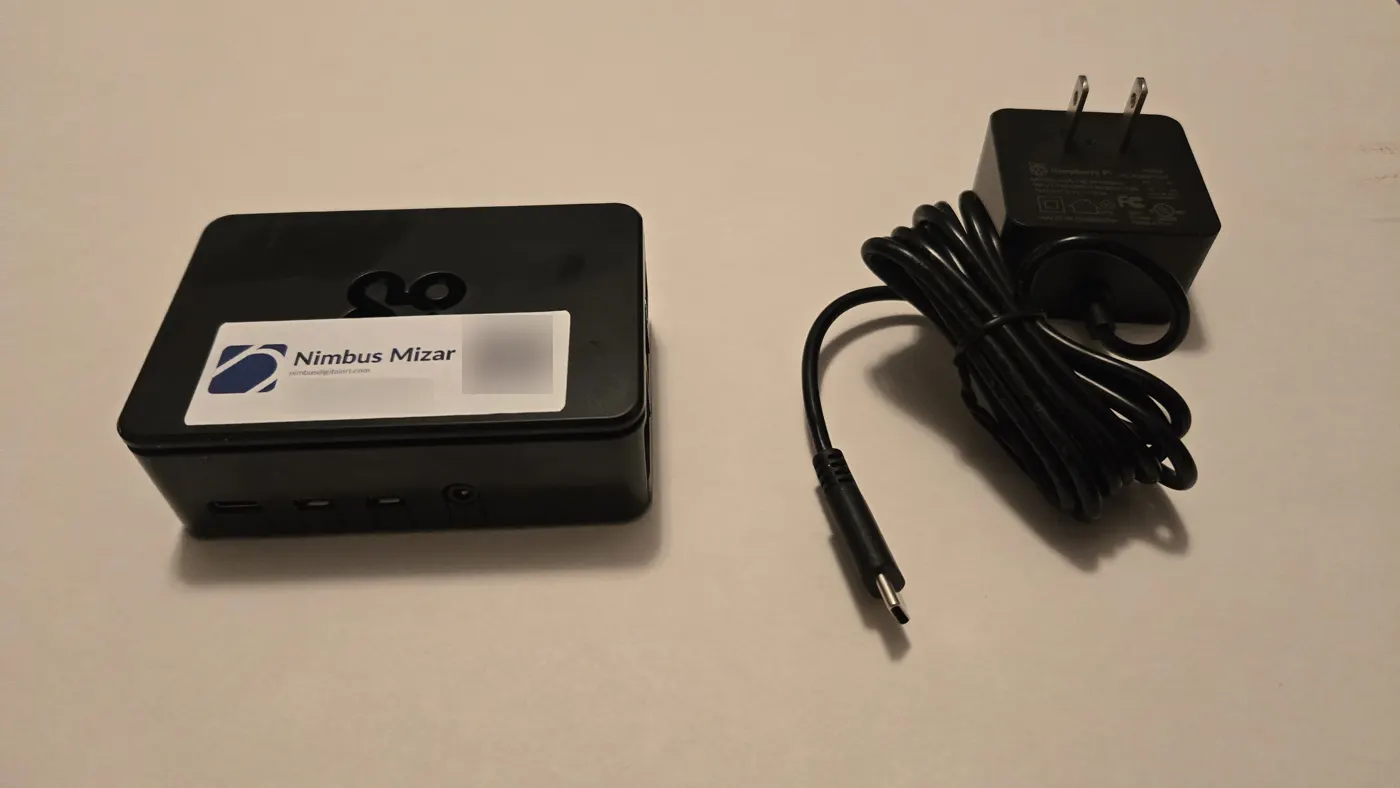
- The Mizar (the small black box with the Nimbus label) and its power supply.
- An HDMI cable.
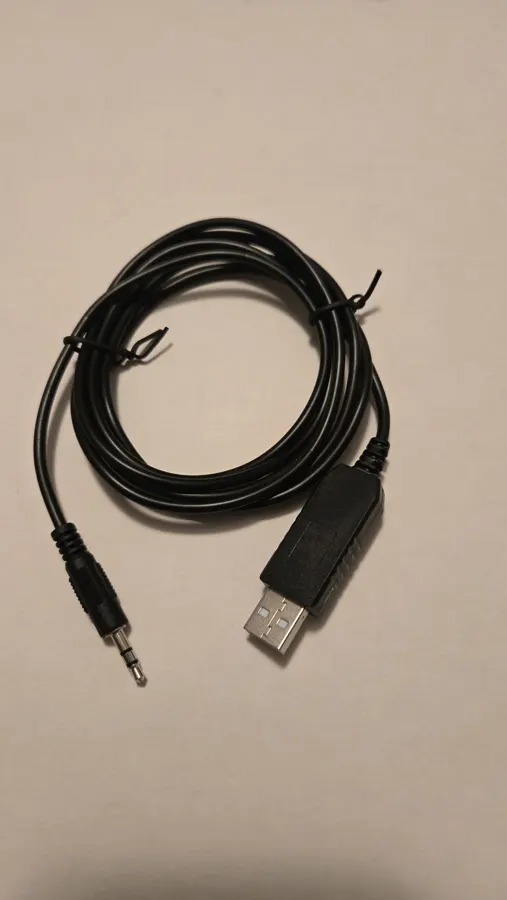
- The Samsung control cable (below). It lets Nimbus turn the screen off at night and set its brightness.
1. Hang the display
Mount the display on the wall with its mount, following the mount's own instructions. Leave the display unplugged for now. Hang it the way you want it, wide or tall, near an outlet.
2. Find the connections on the back of the display
Look at the strip of ports on the back of the display. The labels are black raised lettering on a black panel and are hard to read, so use a flashlight and look at the panel from the side. You'll use three things:
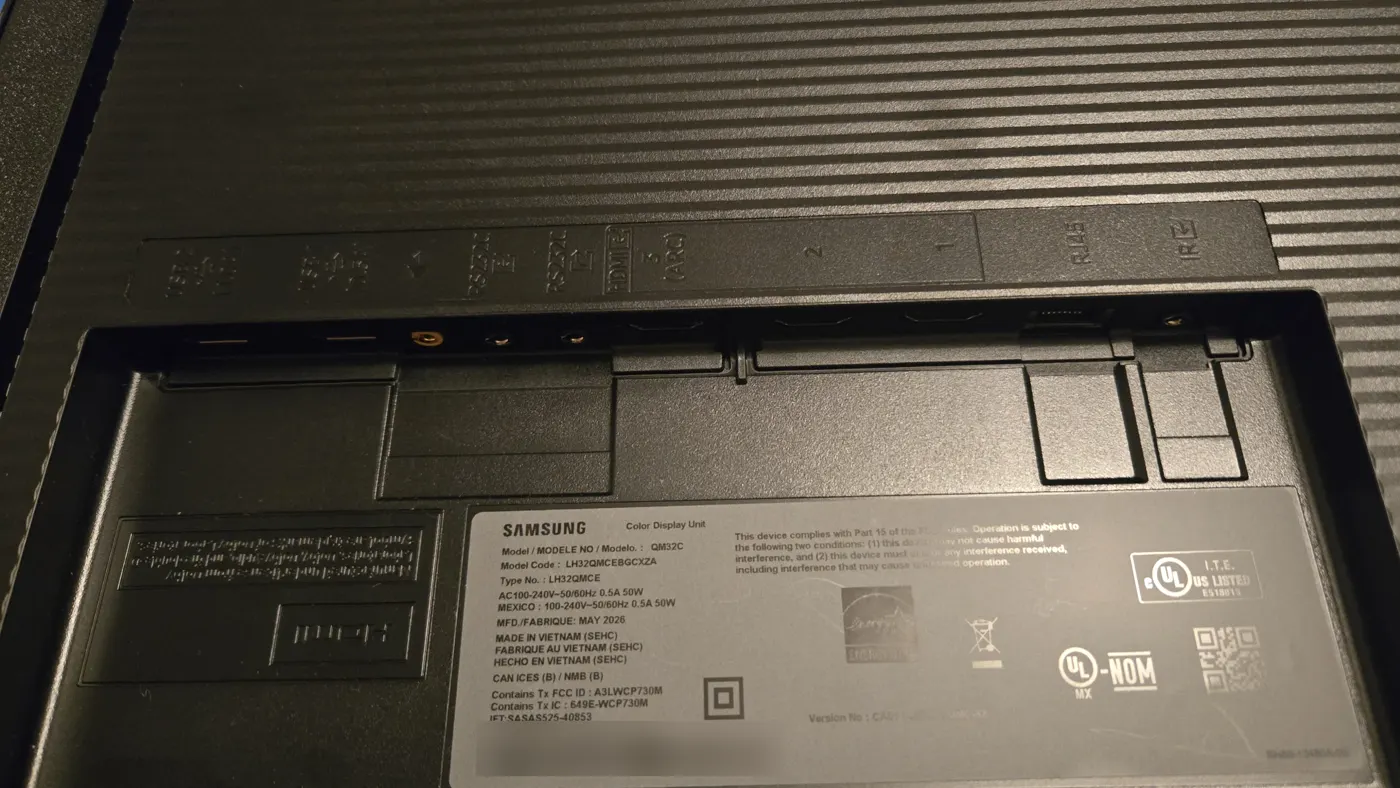
- HDMI 1 (picture). The HDMI ports are numbered 1, 2 and 3; use 1.
- RS232C IN (control cable)
- The display's own power cord
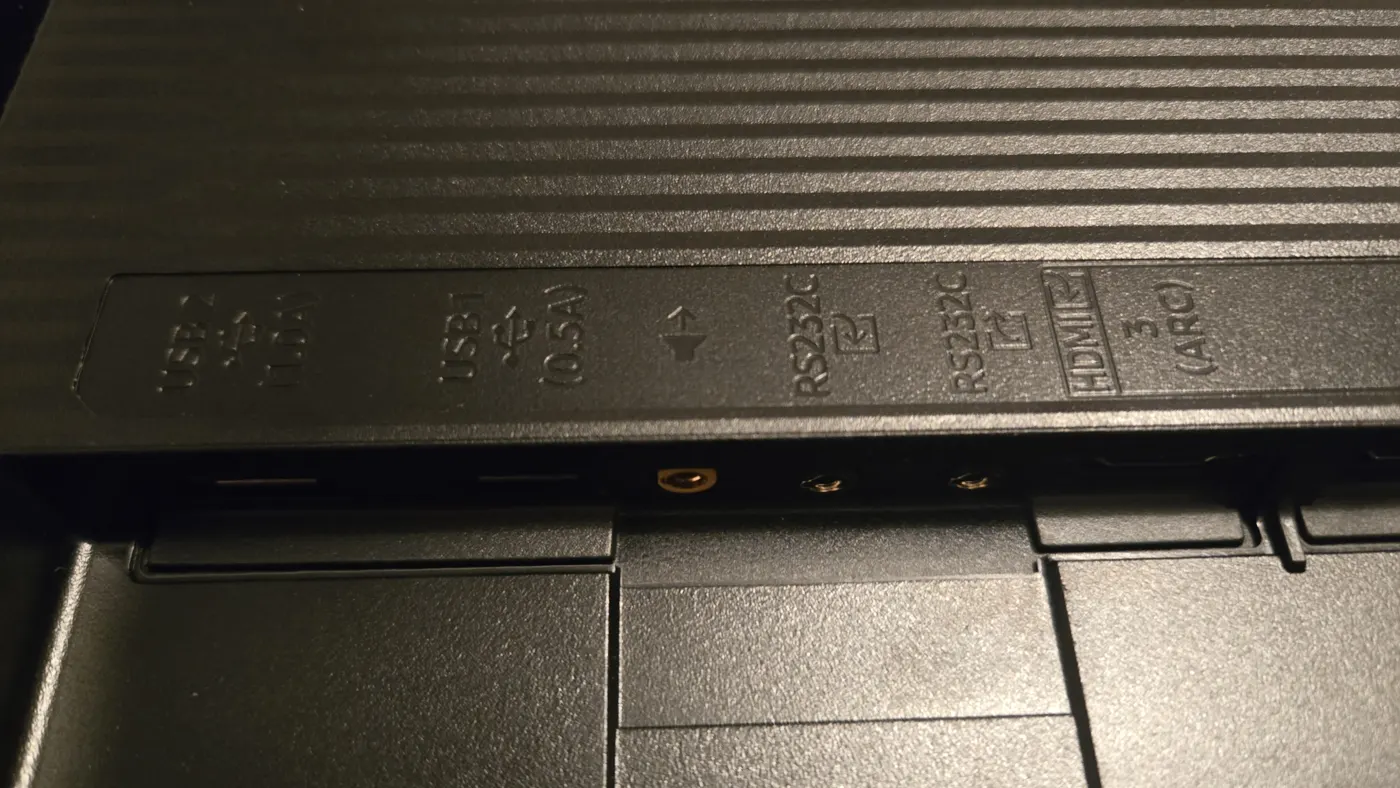
There are two RS232C jacks. Use the one right next to the headphone jack. It's marked IN, shown only as a small arrow pointing into a box. Ignore the other one (OUT). Your display's panel may be laid out a little differently from the photos.
3. Connect the HDMI cable
Plug one end of the HDMI cable into the display's HDMI 1. Plug the small end into the Mizar's open micro-HDMI port (the small port, not a full-size one), right next to the power (USB-C) port. The other micro-HDMI port is covered by a strip of white tape; leave it on so you use the right port. If yours has no tape, still use the one right next to the power port, or the picture may not appear.
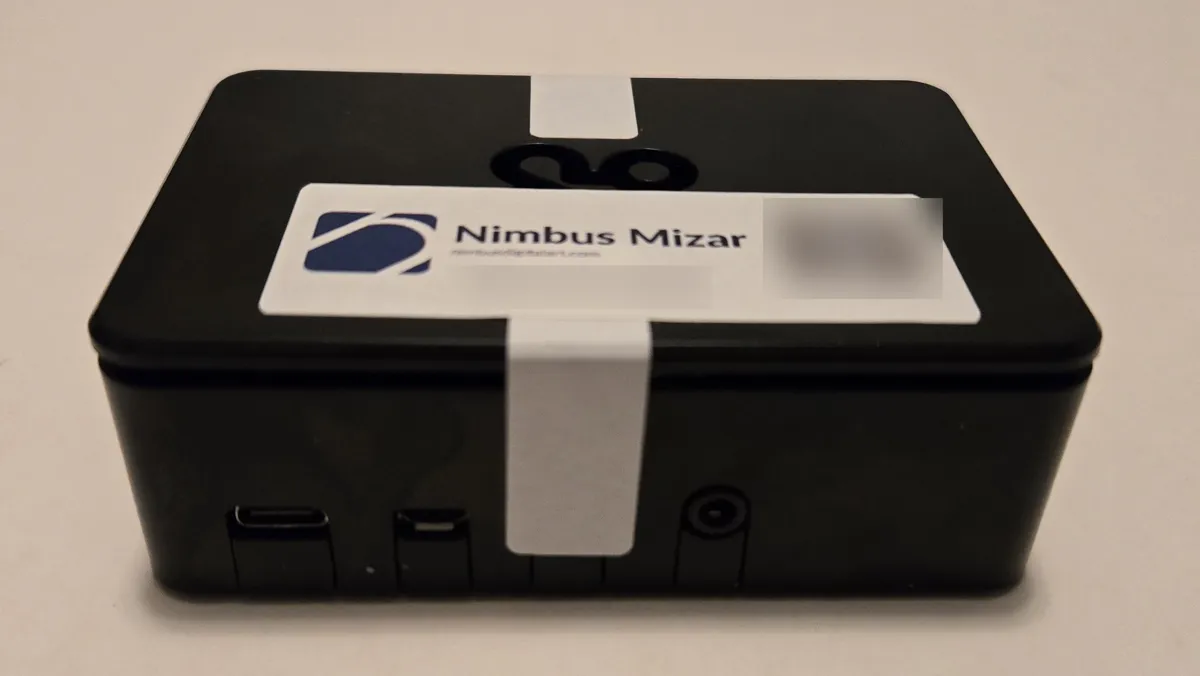
Left to right: the power (USB-C) port, the open micro-HDMI port (use this one), the covered micro-HDMI port, and a round jack you won't use.
4. Connect the control cable
Plug the USB end into any USB port on the Mizar. Plug the small round plug into the display's RS232C IN jack.
5. Plug in the power
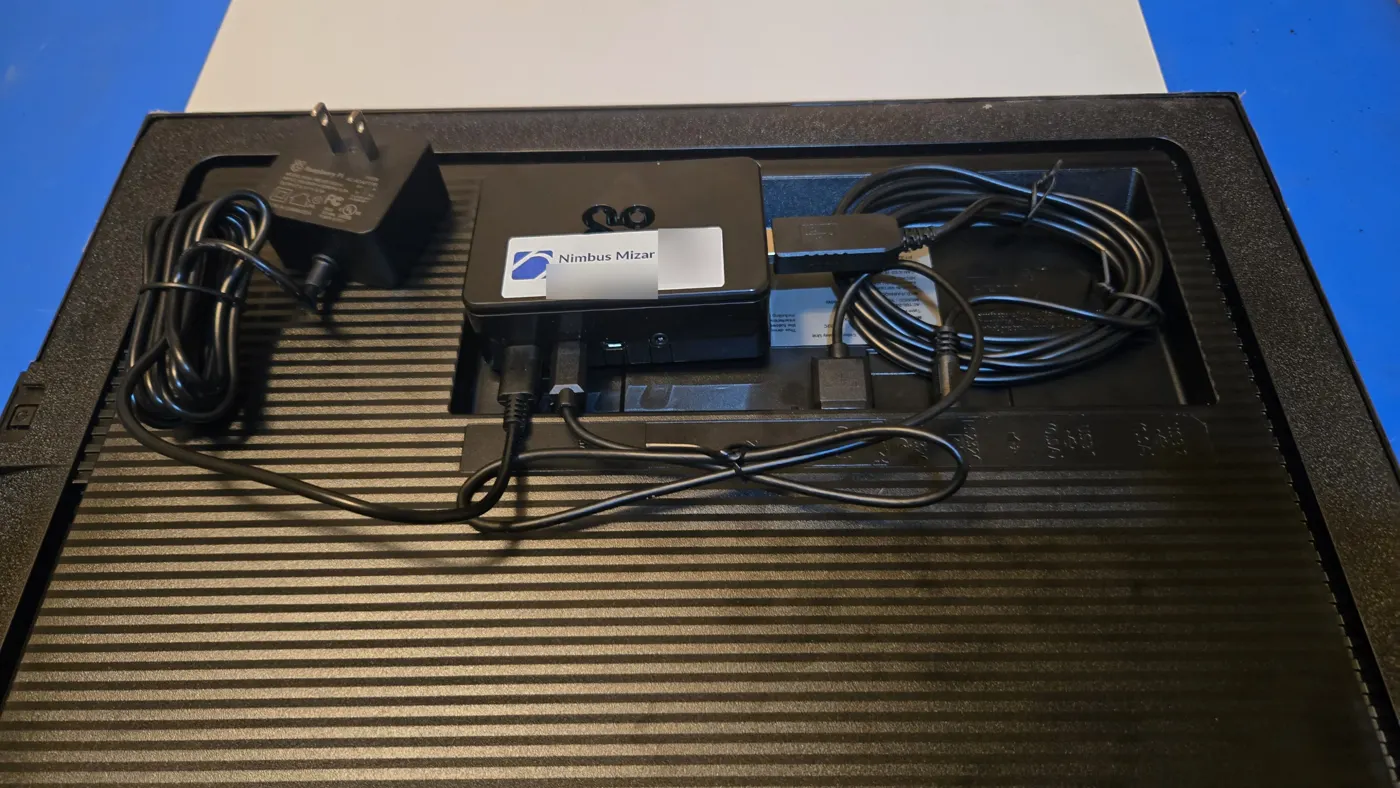
Plug in the Mizar's power supply first, then the display's power cord. Tuck the Mizar into the display's rear bay (or behind it) and gather the cables.
6. Set up the display with its remote
The first time a Samsung display starts, it asks a few setup questions. Use the display's own remote. Menus may look a little different on your model; make the same choices.
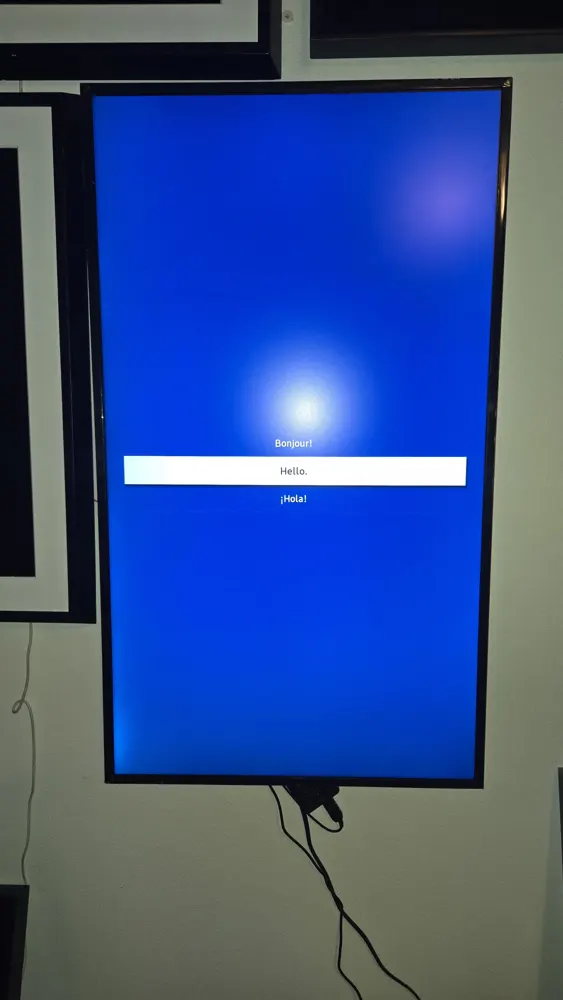
- Language: choose yours.
-
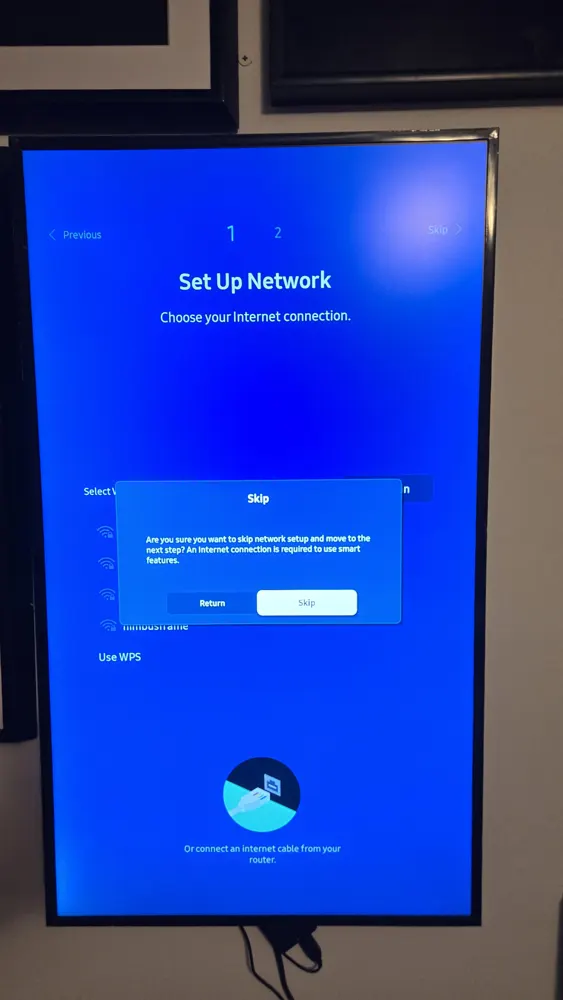
Set Up Network: choose Skip, then Skip again when it asks you to confirm.
-
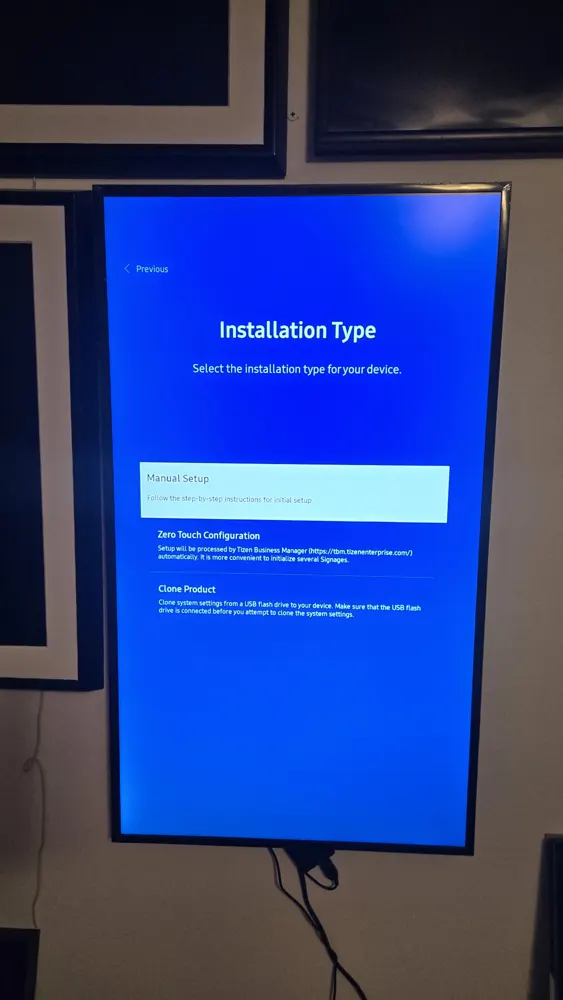
Installation Type: choose Manual Setup.
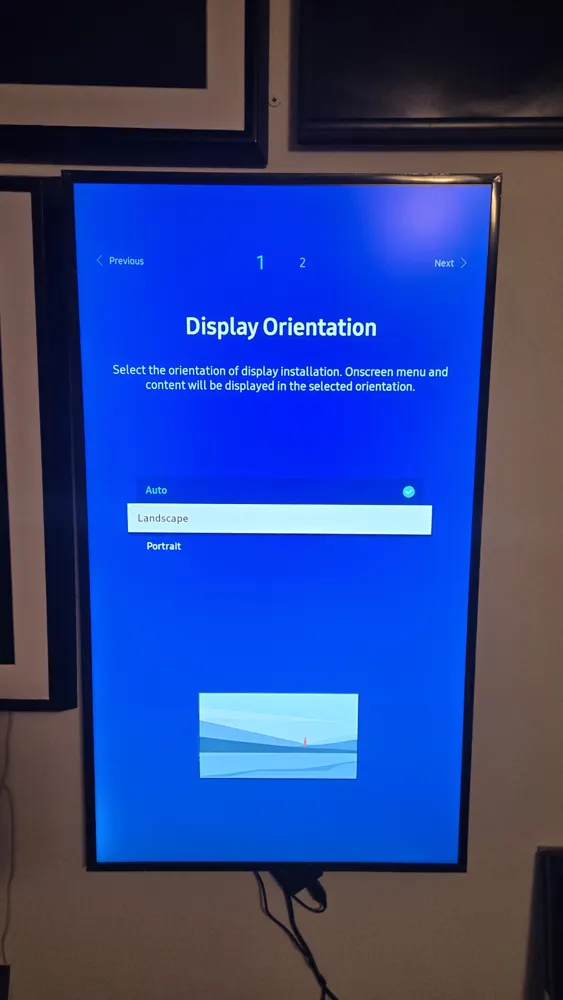
- Display Orientation: choose Landscape, even if you hung the display tall. The Samsung's own menus will then turn sideways. That's expected; the Mizar turns your art the right way itself.
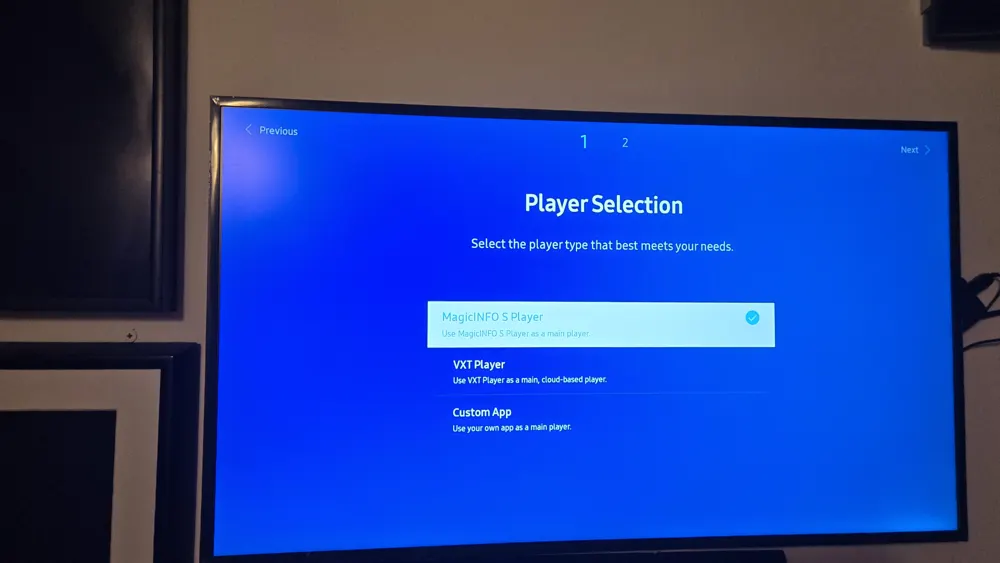
- Player Selection: leave MagicINFO S Player selected and choose Next.
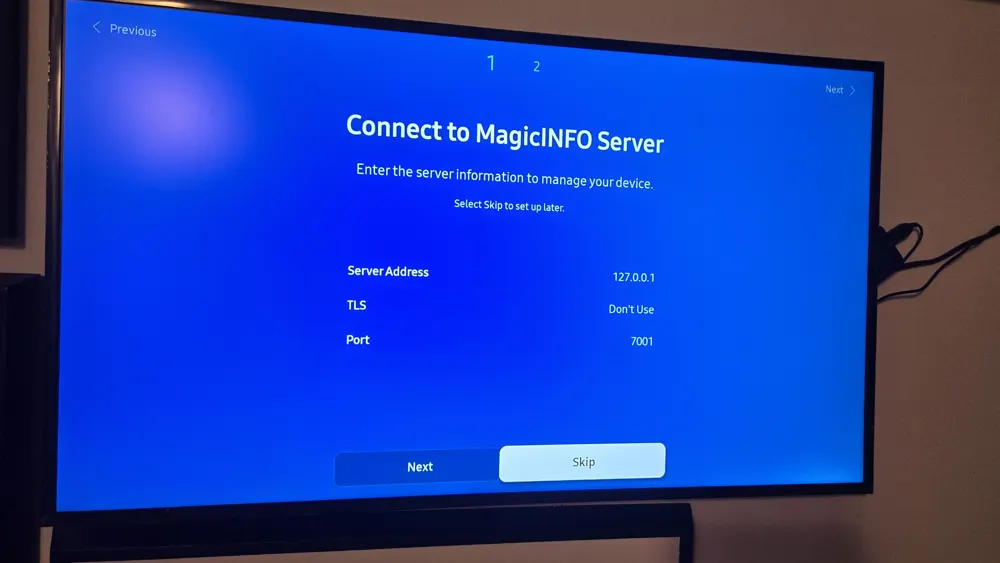
- MagicINFO Server: choose Skip.
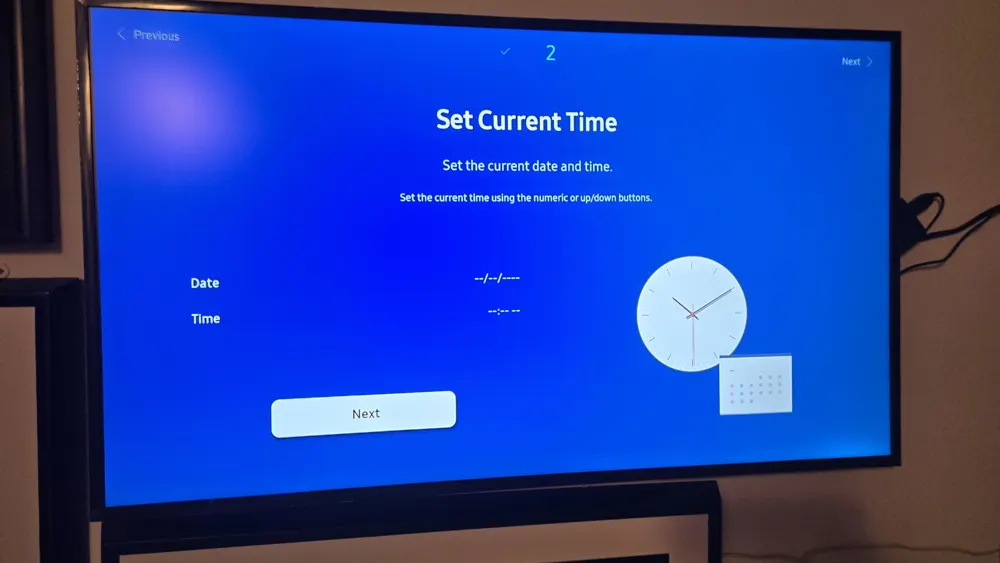
- Current Time: choose Next.
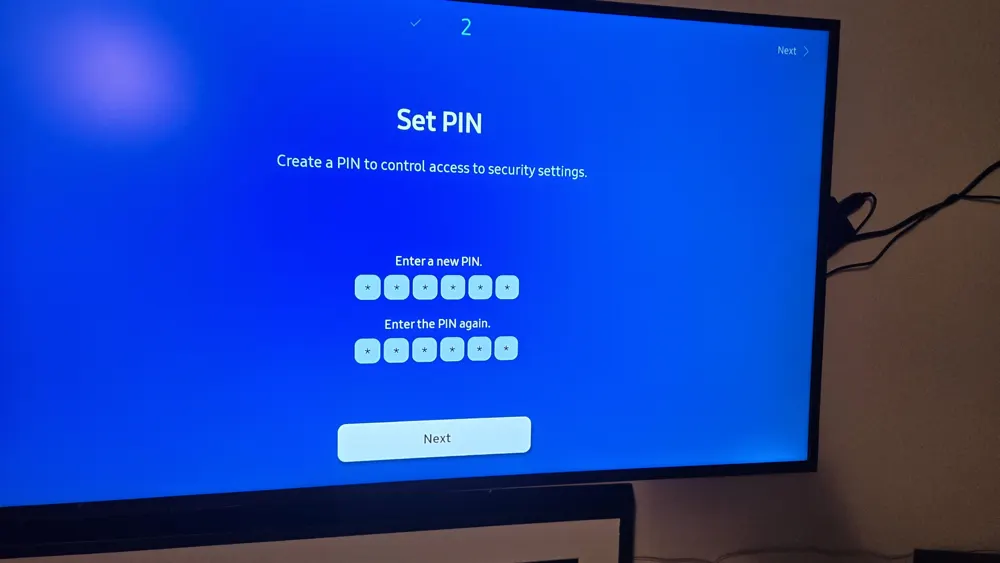
- PIN: choose any 6 digits, enter them twice, and write them down. You'll need the PIN if you ever change the display's security settings.
7. Choose the right input
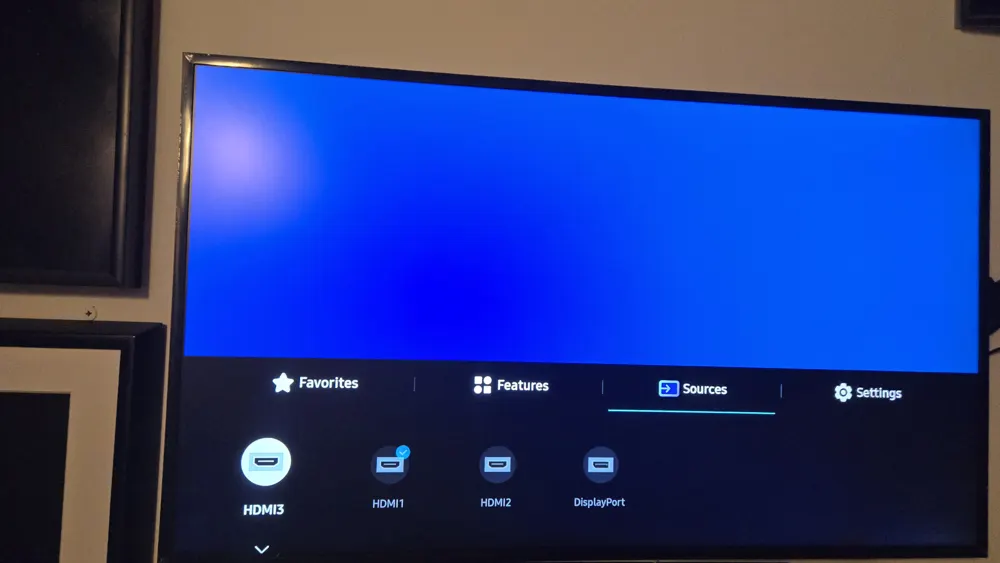
After setup, the display should show the Nimbus screen. If it doesn't (a blank or "No signal" screen), press Source on the remote and choose HDMI 1.
What you'll see before setup is finished
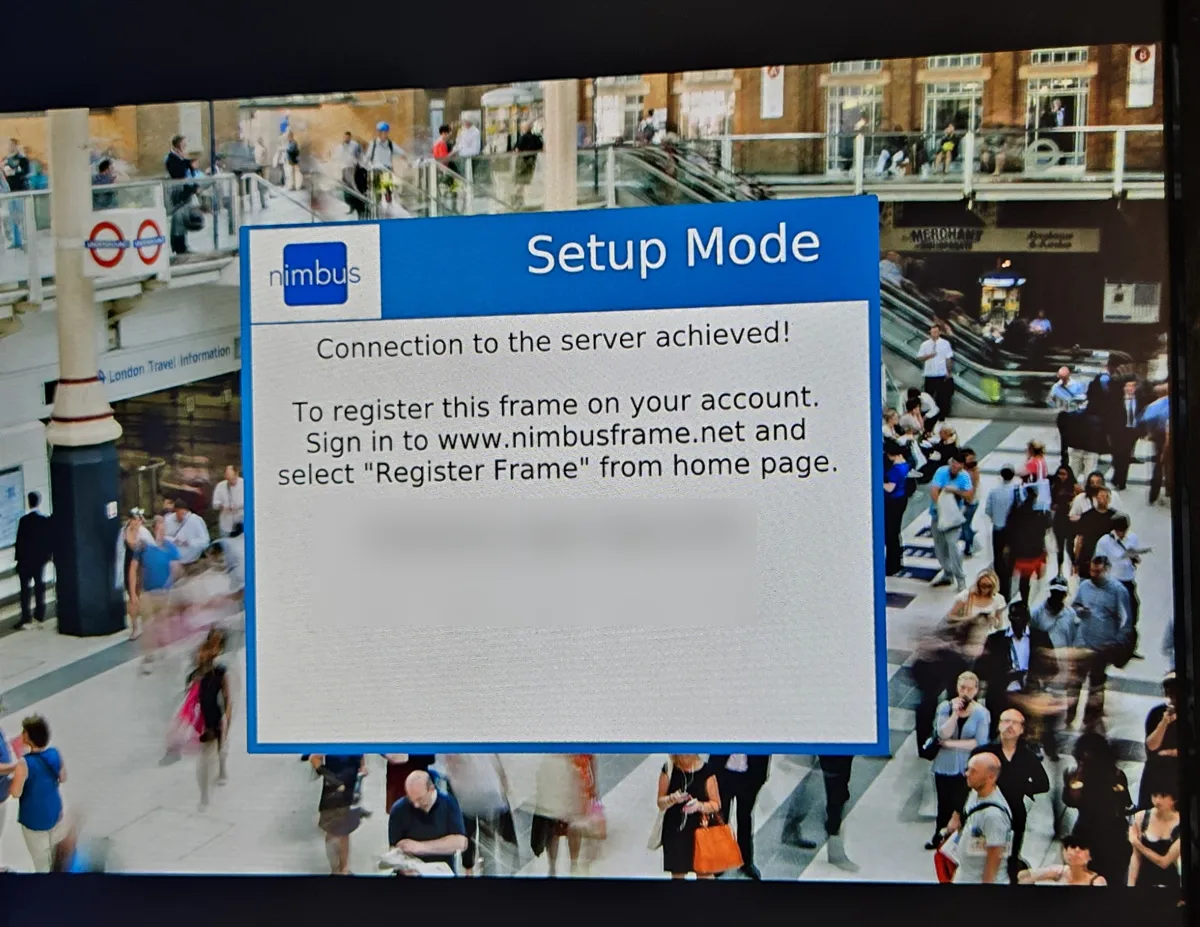
Until you add the Mizar to your account in the app (step 9), the display shows a Setup Mode card over a background picture, with a reference code. That's expected. It means the Mizar is connected and waiting for you. The card mentions signing in on our website; adding the Mizar in the app, as in step 9, works too. Once you finish step 9, the card goes away and your art starts to appear.
8. Turn on Input Signal Plus
With the Nimbus screen showing, open the display's menu: Menu > Picture > Advanced Settings > Input Signal Plus > On, on the input the Mizar is plugged into (HDMI 1). The setting is per input. This lets the Mizar show your art at full quality.
9. Connect it to your Wi-Fi in the Nimbus app
Install the Nimbus app and sign in (see Installing the app and signing in). Then tap Frames, then +, then Set Up New Frame, and keep your phone near the Mizar.
Right after setup finishes, the picture may restart itself two or three times within about a minute while it applies layout and updates. That's normal. Your art appears within a few minutes; videos can take longer the first time.
If something doesn't look right
- You see a short start-up screen, then "No signal": the cable is probably in the wrong Mizar port. Move it to the micro-HDMI port right next to the power (USB-C) port.
- "No signal" or a black screen: press Source and choose HDMI 1. If it's still blank, check the HDMI cable is in the Mizar's micro-HDMI port next to the power port and the display's HDMI 1, then unplug the Mizar's power supply for 30 seconds and plug it back in.
- The screen doesn't turn off at night, or brightness doesn't change: check the control cable is firmly in RS232C IN (not OUT) and in a Mizar USB port.
- The screen is dark at night: that's normal. Your frame follows a sleep schedule, which you can change in the Nimbus app.
- Still stuck: email support@nimbusdigitalart.com, call (800) 640-6171 (leave a message), or book a call: https://calendly.com/nimbussupport/nimbus.