
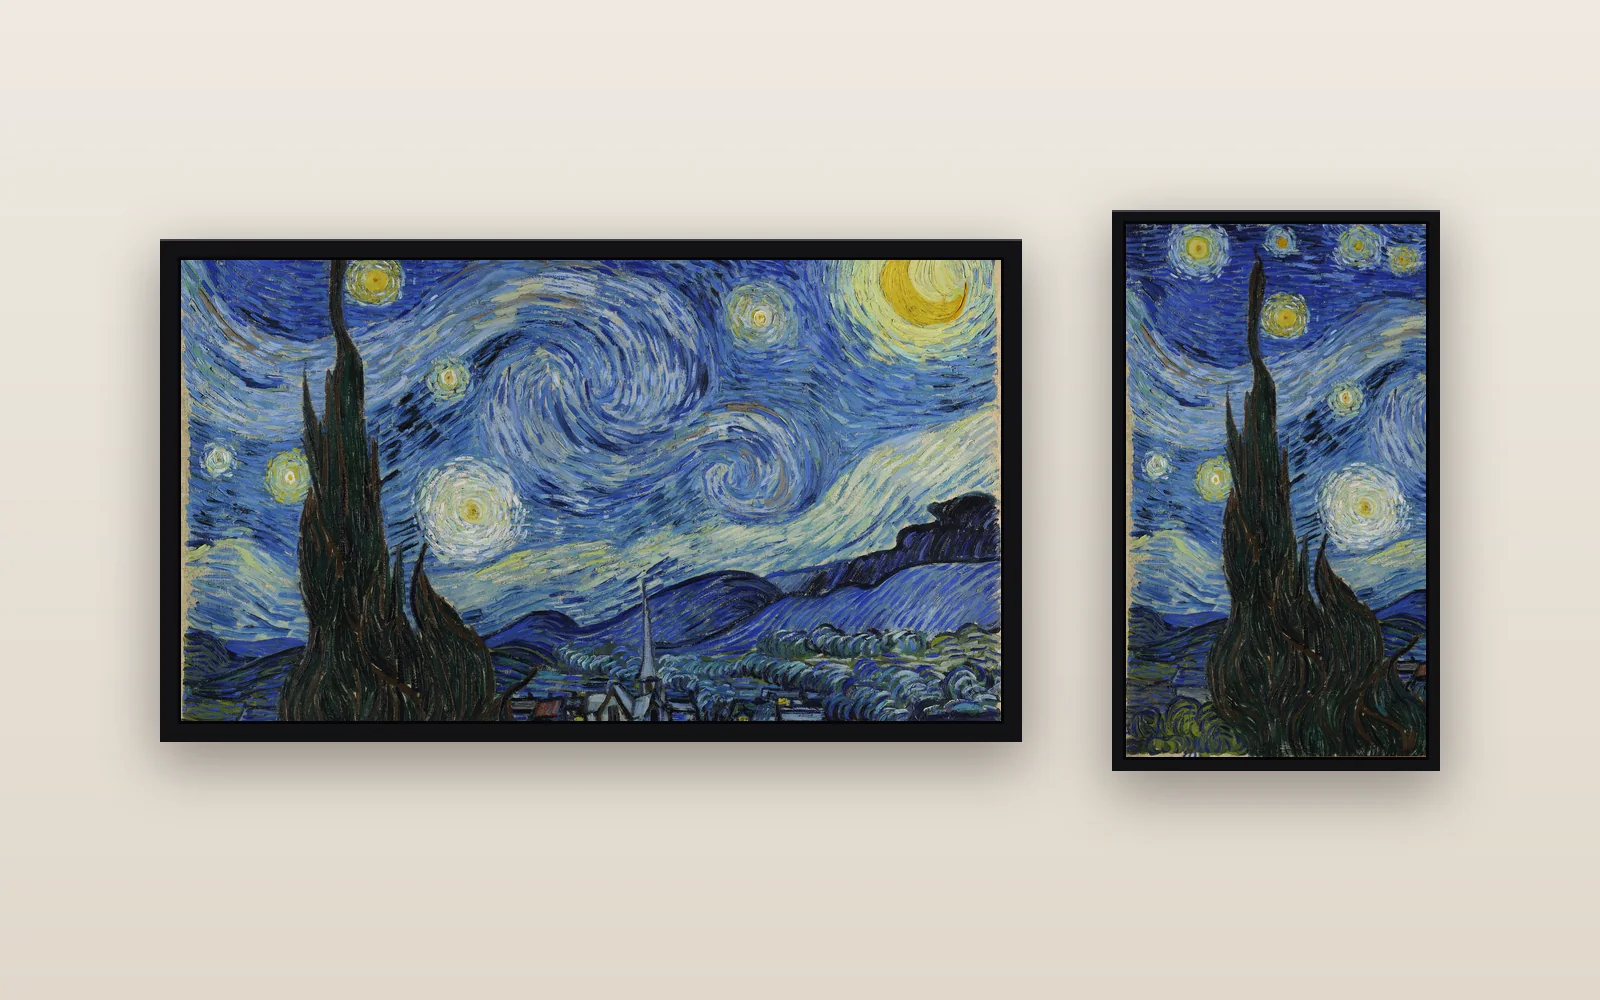
What is showing on your frame? Some customers display every snapshot in its original shape, black borders and empty space included. Others collect all their photos into one huge playlist of memories and let it slideshow on the frame, and Nimbus works great for that. But you can also use your memories, art and images to design your space to its full potential, and this guide shows you how.
Photos rarely come in exactly the shape of your frame. Adjust Framing fixes that: a tall phone photo (portrait) on a wide frame (landscape), or a group shot where someone's head gets cut off. You slide and zoom each photo so the part you care about is what's on the wall.
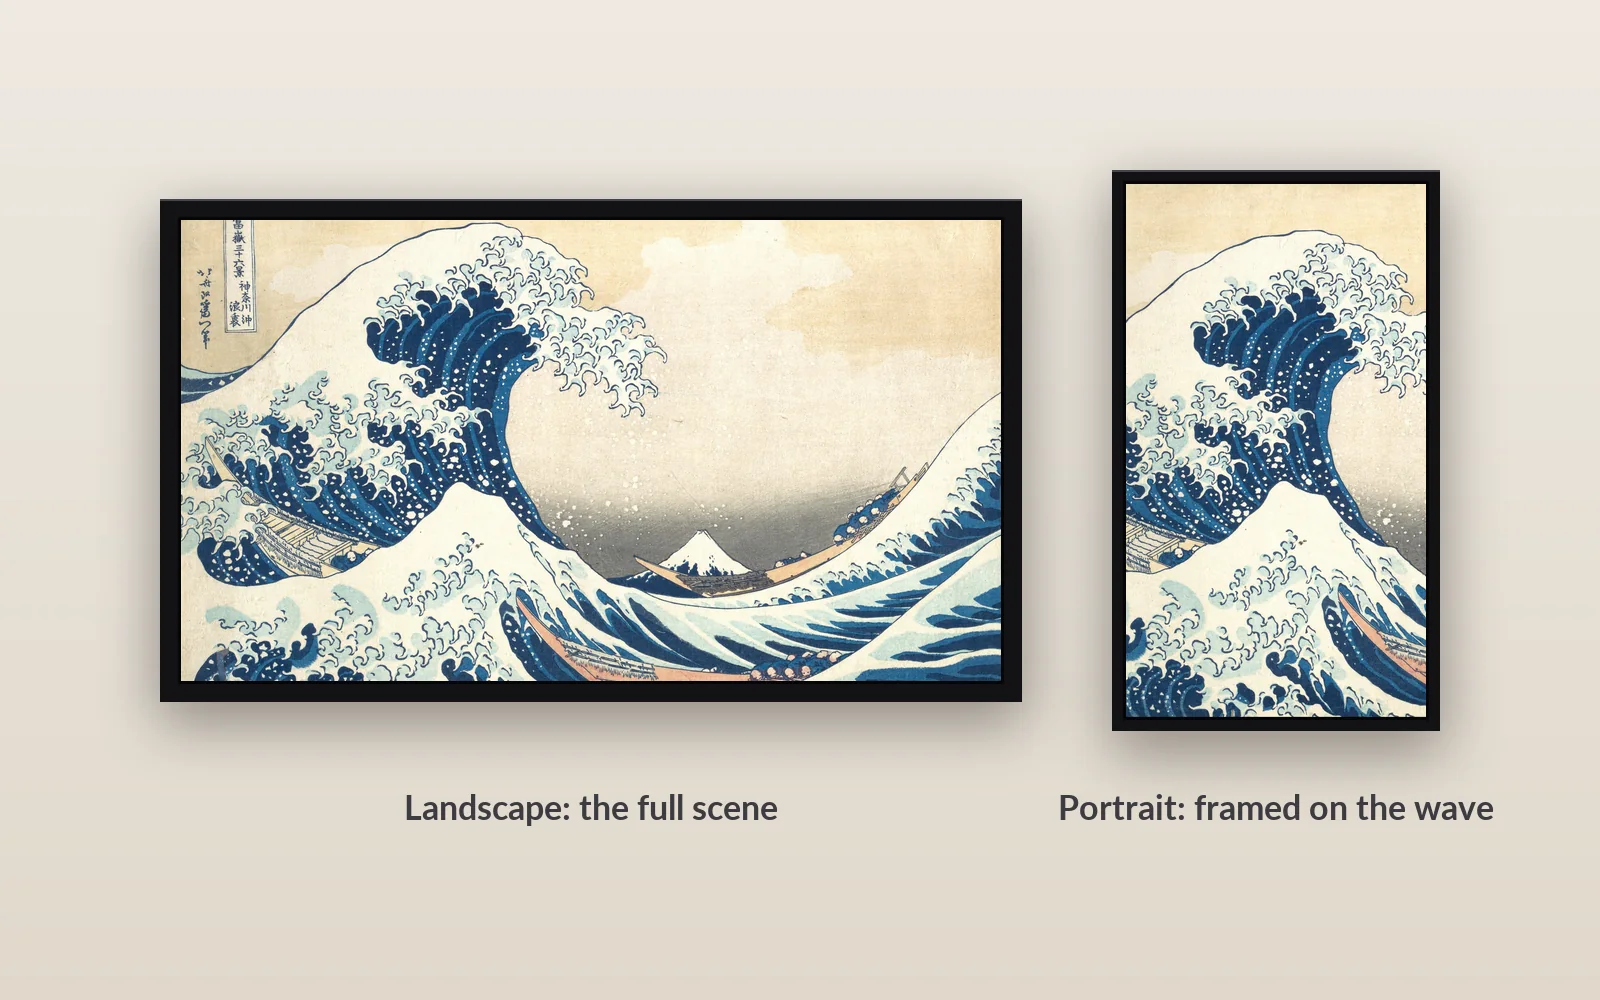
It's completely manual, so you're in control, and it never changes your original photo. It only changes how the photo is shown on that frame.
In the app
- Open the Nimbus app and tap the Photos tab.
- Tap Uploaded Photos (or My Art) and tap the photo you want.
- Tap Adjust Framing.
- If you have more than one frame, it asks "Adjust framing for which frame?" Each frame keeps its own framing, so the same photo can be set up differently on a wide frame and a tall one.
- Drag the photo to move it, and pinch to zoom, until it looks right.
- Tap Save Framing. Changed your mind? Reset puts it back the way it was.
Fixing the photo that's on the frame right now? Go to Frames, open your frame's Settings, and tap Adjust Current Photo's Framing.
On the website
You can also do it on a computer at nimbusframe.net:
- Sign in and open your photos, then click the photo you want.
- In the Your Frame(s) box you'll see a preview of the photo on each of your frames. Under the frame you want to change, click the green Modify button.
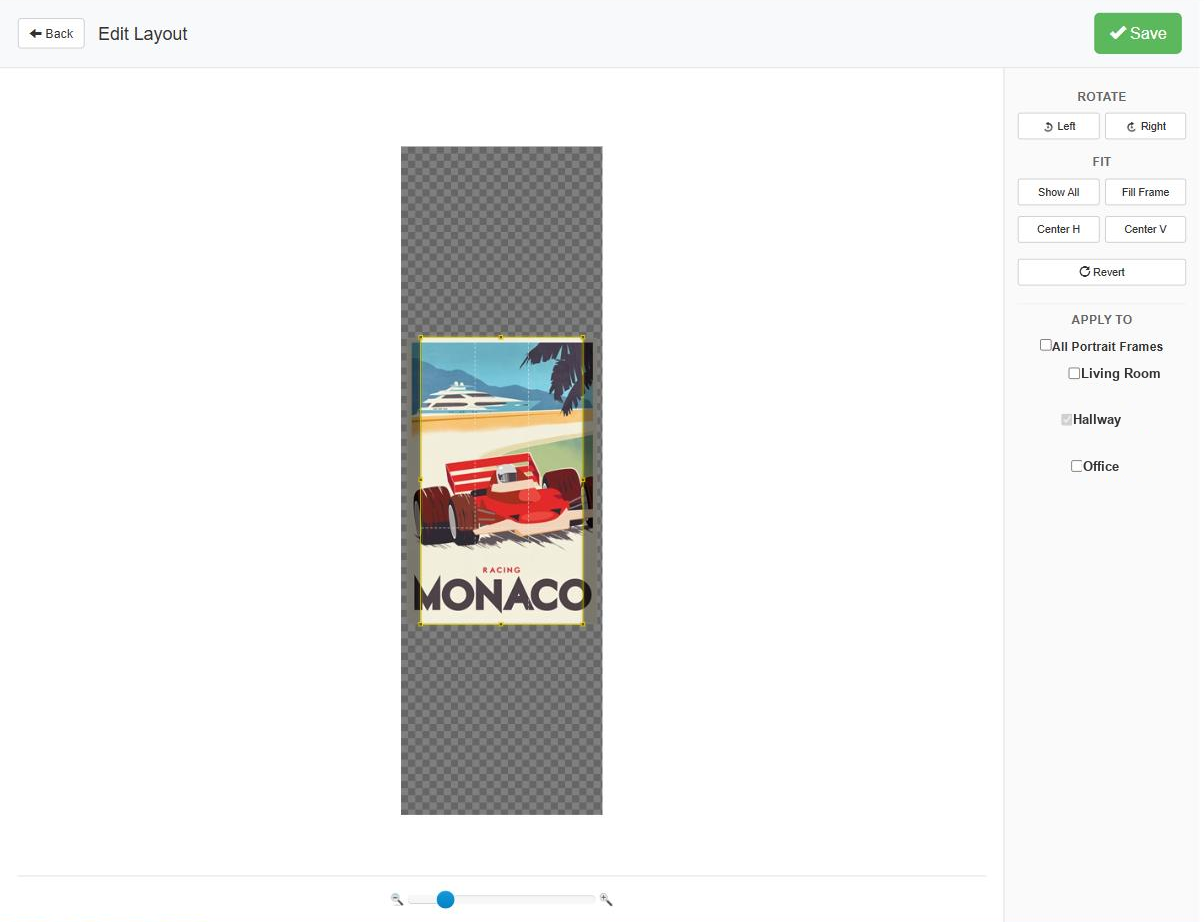
- On the Edit Layout page, drag and resize the box around the part of the photo you want to show. The panel on the right can also rotate the photo, or use Show All / Fill Frame to fit it quickly. Revert undoes your changes.
- To use the same framing on other frames, tick them under Apply To, or choose All Landscape Frames / All Portrait Frames.
- Click Save at the top right.
This works for art from the Nimbus library too. Your framing only changes how the art looks on your frames.
Need a hand?
Email support@nimbusdigitalart.com or book a quick call at https://calendly.com/nimbussupport/nimbus.